
Showing posts with label recipe. Show all posts
Showing posts with label recipe. Show all posts
Friday, July 31, 2015
Apple Cherry Cider
This Recipe is in keeping with the theme to keep things simple and inexpensive and tasty. I noticed a frozen juice concentrate brand named Old Orchard, labeled 100% natural and no preservatives, the flavor was Apple Cherry. Sounded like a great base for a new Cider to me. I was right.
 Instructions say each can makes 48 oz. that means to get make 5 gallons of cider you’ll need 13 and a third cans. I don’t know how to buy a 1/3 of a can so I used 15. At $1.47 each the cost of the juice concentrate is $22, I used my standard US05 ale yeast, $2.65, and 4 pounds of sugar $2 ( I buy 25lb bags). So total cost is less than $30 to make 5 gallons.
Using juice concentrates causes a problem, they have to be diluted with water. Chlorine in your water will kill yeast and you’ll end up having trouble to start fermentation. The trick is to use un-chlorinated water. My water comes from a well and is naturally chlorine free. If your tap water is from the city, it contains chlorine. To remove the chlorine put 5 gallons in a carboy and set it in the sun for a few days, or get 5 gallons of “purified” water from your local store.
Recipe makes 5+ gallons.
15 cans Old Orchard Apple Cherry frozen juice concentrate
4 pounds sugar
1 pkg US05 Ale Yeast
3.6 gallons Water
Thaw your concentrate. Put about 2 gallons of water into your carboy or brewing bucket, add all concentrate, and sugar, then stir. Add remaining water to bring total volume to 5 gallons, pitch your yeast, and let it ferment for a week or so(until bubbling rate is down to 1 bubble every 8 to 10 seconds). Transfer to secondary fermentation container and let sit another week or two to let the yeast drop out then bottle. If you want it bubbly just bottle it without secondary and let it sit in a cool place for a few weeks.
It’s a semi-dry cider with lots of aroma and flavor.
Instructions say each can makes 48 oz. that means to get make 5 gallons of cider you’ll need 13 and a third cans. I don’t know how to buy a 1/3 of a can so I used 15. At $1.47 each the cost of the juice concentrate is $22, I used my standard US05 ale yeast, $2.65, and 4 pounds of sugar $2 ( I buy 25lb bags). So total cost is less than $30 to make 5 gallons.
Using juice concentrates causes a problem, they have to be diluted with water. Chlorine in your water will kill yeast and you’ll end up having trouble to start fermentation. The trick is to use un-chlorinated water. My water comes from a well and is naturally chlorine free. If your tap water is from the city, it contains chlorine. To remove the chlorine put 5 gallons in a carboy and set it in the sun for a few days, or get 5 gallons of “purified” water from your local store.
Recipe makes 5+ gallons.
15 cans Old Orchard Apple Cherry frozen juice concentrate
4 pounds sugar
1 pkg US05 Ale Yeast
3.6 gallons Water
Thaw your concentrate. Put about 2 gallons of water into your carboy or brewing bucket, add all concentrate, and sugar, then stir. Add remaining water to bring total volume to 5 gallons, pitch your yeast, and let it ferment for a week or so(until bubbling rate is down to 1 bubble every 8 to 10 seconds). Transfer to secondary fermentation container and let sit another week or two to let the yeast drop out then bottle. If you want it bubbly just bottle it without secondary and let it sit in a cool place for a few weeks.
It’s a semi-dry cider with lots of aroma and flavor.

Wednesday, April 11, 2012
Ginger Cider
Today I bottled a new batch and new flavor. As I brew less because I’ve been diagnosed with diabetes, and am down to drinking one bottle a week, this recipe is for 3 gallons not the standard 5.
I used to love ginger beer (not ale) but it is almost impossible to buy anymore. So as with the cider I looked for recipe’s to make home made ginger beer. There are a bunch and all are similar to traditional cider making, so. . . . .

Instead of plain Cider to a basic recipe I added a good sized chunk of ginger root (1/2 the root as sold at the grocery store). It was prepared by pealing and slicing it as thin as I could, boiling in about 2 cups of water for 5 min and letting sit to room temp. It was added to my 3 gallon carboy, with all the ginger pieces, and then the cider was made as normal.
The Cider came out delightfully spicy but it needed a bit more punch, next time I’ll use the entire root. It’s sweet and about 14% alcohol.
Recipe:
1 ginger root (whole thing)
1 oz Green Apple Extract
2 lbs sugar
2.5 gallons Winn Dixie Apple Juice
1 pkg Safale US-05 Dry Ale Yeast
I used to love ginger beer (not ale) but it is almost impossible to buy anymore. So as with the cider I looked for recipe’s to make home made ginger beer. There are a bunch and all are similar to traditional cider making, so. . . . .

Instead of plain Cider to a basic recipe I added a good sized chunk of ginger root (1/2 the root as sold at the grocery store). It was prepared by pealing and slicing it as thin as I could, boiling in about 2 cups of water for 5 min and letting sit to room temp. It was added to my 3 gallon carboy, with all the ginger pieces, and then the cider was made as normal.
The Cider came out delightfully spicy but it needed a bit more punch, next time I’ll use the entire root. It’s sweet and about 14% alcohol.
Recipe:
Tuesday, April 3, 2012
Moose Mead
Finally made it!!
Drunken Moose Mead

Smooth Sweet and Strong
This is in honor of the moose (elk) in sweeden who got drunk drinking fermented apples and stuck in a tree. See my blog entry below.
48oz Honey
2 lbs Sugar
Dilute to 3 gallons with Apple Juice
1 oz Green apple extract
1 Package Champaigne yeast
Results were a 22% Alocohol, strongly carbonated, cyser that is awsome.
Drunken Moose Mead
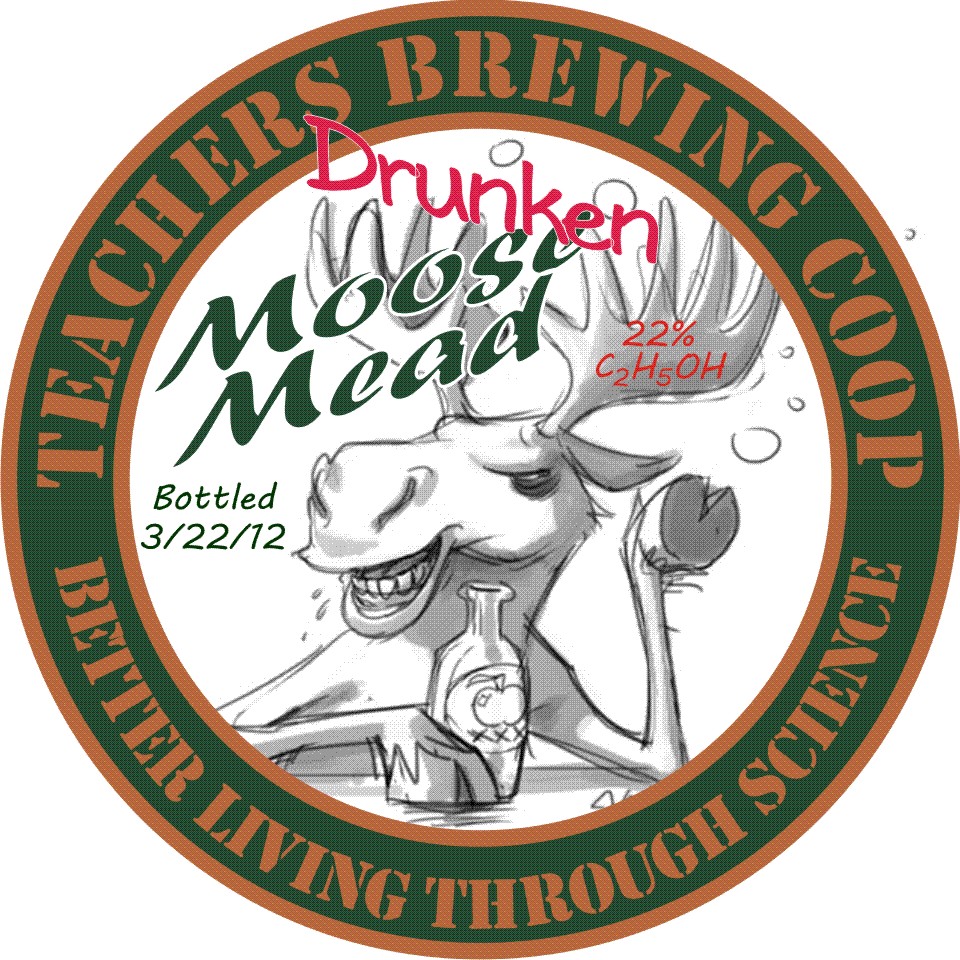
Smooth Sweet and Strong
This is in honor of the moose (elk) in sweeden who got drunk drinking fermented apples and stuck in a tree. See my blog entry below.
48oz Honey
2 lbs Sugar
Dilute to 3 gallons with Apple Juice
1 oz Green apple extract
1 Package Champaigne yeast
Results were a 22% Alocohol, strongly carbonated, cyser that is awsome.
Sunday, May 29, 2011
Cyser - improved
Cysers have become a favorite of those who enjoy the efforts of the Teacher’s Brewing Coop. As a reminder, a cyser is a specific type of Mead. Mead being a fermented honey beverage. Mead is considered by some to be mankind's oldest fermented beverage. Mead is simply honey and water that has fermented. Early examples were fermented by wild yeast. Mead is independently multicultural. It is known from many sources of ancient history throughout Europe, Africa and Asia, although archaeological evidence of it is ambiguous. Its origins are lost in prehistory; "it can be regarded as the ancestor of all fermented drinks," Maguelonne Toussaint-Samat has observed, "antedating the cultivation of the soil." Claude Lévi-Strauss makes a case for the invention of mead as a marker of the passage "from nature to culture."
When honey is mixed with fruit juice the resulting fermentation is a type of mead known as metheglin. When the fruit juice used in making metheglin is apple juice - the resulting fermentation is known as cyser.
The road side honey stand on Venable Street in Crystal River that I pass every day, sells natural Citrus County wild flower and orange blossom honey depending on the season. This with my standard base stock of WD brand Apple Cider and some tinkering with the recipe, has resulted in a repeatable sweet beverage containing around 15% alcohol, that because of it’s popularity, has precluded most of the regular cider this spring.
Improved Cyser Recipe
4.5 gallons Apple juice (bottle says cider)
5 lb. Citrus County natural honey (you may substitute a substandard honey from you local area, but it won’t come out as good as Citrus County Honey)
2.5 lb table sugar
½ oz green apple extract
1 pkg. Safale US-05 Dry Ale Yeast
Heat the honey by placing the honey container in a large pot of water on the stove and boiling the water. This will allow the honey to flow and dissolve. To your fermenting container add 1 gallon of the apple cider, then add the honey and stir it well. Add another 2 gallons of apple cider and the sugar and stir this well; add another gallon of apple cider and the yeast package and stir this well; top off with cider to 5 gallons and ½ oz of green apple extract. If you’re using a glass or plastic carboy and not a brewing bucket, cover it so that it isn’t exposed to light, or put it in a dark closet. A standard grocery store paper bag with a hole cut in the bottom makes a great cover for your carboy, and costs almost nothing. The fermentation should start in a day or so. Allow it to ferment 8 to 12 days depending on temperature. In my air conditioned house it’s done at about 9 days. Add 1/2 tsp of potassium sorbate to stop the fermentation and bottled the next day. The product is not clear but is delicious and drinkable right on bottling day. It will clarify over time, and after 6 months this brew is truly the nectar of the gods.
When honey is mixed with fruit juice the resulting fermentation is a type of mead known as metheglin. When the fruit juice used in making metheglin is apple juice - the resulting fermentation is known as cyser.
The road side honey stand on Venable Street in Crystal River that I pass every day, sells natural Citrus County wild flower and orange blossom honey depending on the season. This with my standard base stock of WD brand Apple Cider and some tinkering with the recipe, has resulted in a repeatable sweet beverage containing around 15% alcohol, that because of it’s popularity, has precluded most of the regular cider this spring.
Improved Cyser Recipe
Heat the honey by placing the honey container in a large pot of water on the stove and boiling the water. This will allow the honey to flow and dissolve. To your fermenting container add 1 gallon of the apple cider, then add the honey and stir it well. Add another 2 gallons of apple cider and the sugar and stir this well; add another gallon of apple cider and the yeast package and stir this well; top off with cider to 5 gallons and ½ oz of green apple extract. If you’re using a glass or plastic carboy and not a brewing bucket, cover it so that it isn’t exposed to light, or put it in a dark closet. A standard grocery store paper bag with a hole cut in the bottom makes a great cover for your carboy, and costs almost nothing. The fermentation should start in a day or so. Allow it to ferment 8 to 12 days depending on temperature. In my air conditioned house it’s done at about 9 days. Add 1/2 tsp of potassium sorbate to stop the fermentation and bottled the next day. The product is not clear but is delicious and drinkable right on bottling day. It will clarify over time, and after 6 months this brew is truly the nectar of the gods.
Thursday, December 23, 2010
OOPS
Quit brewing over the summer, too hot, and made a plethora of mistakes on the first batch of the year. Thank God for mistakes. This year’s Cider is by far the best. After lots of experimentation last year, and some awesome results, the goal at the start of the year was to make a very well balanced hard cider that was extremely drinkable. Lots of study and research went in to try and figure out what was usually missing to make our Cider better than good but great, and still inexpensive to make.
Keeping to a base of store bought apple cider/juice using the consistent and inexpensive crystal clear store brand apple cider from concentrate was essential. At around $3.59 a gallon it’s a good place to start. Cider made from this is good, and can be made very strong, but is a bit bland flavor wise. Research showed that it is mostly made of sweet table apples, and has none of the tartness that gives hard cider it’s body, and flavor. Most good hard ciders are made from a blend of sweet and tart. In general 2 parts sweet apples to one part tart apples. So to punch up the flavor a bit and still keep the price down, we started adding Natures Flavors Green Apple Natural Flavor Extract. Following the recommendation on line and on the bottle we added a ¼ tsp for each gallon. It helped some but the flavor still wasn’t up to snuff, and we were finding that the easy to drink but very strong (18% alcohol) cider made using Champagne yeast had the effect of making it too strong and getting drunk isn’t the goal. Its smoothness and high alcohol content surprised a few friends.
As an accident the first batch of the year didn’t start off well, no bubbling after 24 hours, so we added another package of yeast hoping to salvage 5 gallons of juice. We added Ale yeast not more Champagne yeast. I had miss-read the old recipe and added about ¼ oz. not ¼ tsp. of Natures Flavors Green Apple Natural Flavor Extract per gallon, and accidentally got snookered into a 4lb not 5lb bag of sugar. 12 days later we bottled 5 gallons of the best stuff we ever brewed. The combination of yeast produced a 10% alcohol sweet beverage with just enough green apple tart to make it fantastic. As mentioned earlier we used that same yeast cake to make 20 gallons of consistent and wonderful cider, by just adding the juice, sugar, and extract to keep it going.
Here’s my new favorite hard cider ingredient list to make 5 gallons of cider.
4 lbs table sugar
1oz. Natures Flavors Green Apple Natural Flavor Extract.
1 Package Champagne yeast
1 Package Ale yeast
5 gallons of store brand apple juice/cider (you’ll have about a quart or so left over if you’re using a 5 gallon carboy)
Keeping to a base of store bought apple cider/juice using the consistent and inexpensive crystal clear store brand apple cider from concentrate was essential. At around $3.59 a gallon it’s a good place to start. Cider made from this is good, and can be made very strong, but is a bit bland flavor wise. Research showed that it is mostly made of sweet table apples, and has none of the tartness that gives hard cider it’s body, and flavor. Most good hard ciders are made from a blend of sweet and tart. In general 2 parts sweet apples to one part tart apples. So to punch up the flavor a bit and still keep the price down, we started adding Natures Flavors Green Apple Natural Flavor Extract. Following the recommendation on line and on the bottle we added a ¼ tsp for each gallon. It helped some but the flavor still wasn’t up to snuff, and we were finding that the easy to drink but very strong (18% alcohol) cider made using Champagne yeast had the effect of making it too strong and getting drunk isn’t the goal. Its smoothness and high alcohol content surprised a few friends.
As an accident the first batch of the year didn’t start off well, no bubbling after 24 hours, so we added another package of yeast hoping to salvage 5 gallons of juice. We added Ale yeast not more Champagne yeast. I had miss-read the old recipe and added about ¼ oz. not ¼ tsp. of Natures Flavors Green Apple Natural Flavor Extract per gallon, and accidentally got snookered into a 4lb not 5lb bag of sugar. 12 days later we bottled 5 gallons of the best stuff we ever brewed. The combination of yeast produced a 10% alcohol sweet beverage with just enough green apple tart to make it fantastic. As mentioned earlier we used that same yeast cake to make 20 gallons of consistent and wonderful cider, by just adding the juice, sugar, and extract to keep it going.
Here’s my new favorite hard cider ingredient list to make 5 gallons of cider.
4 lbs table sugar
1oz. Natures Flavors Green Apple Natural Flavor Extract.
1 Package Champagne yeast
1 Package Ale yeast
5 gallons of store brand apple juice/cider (you’ll have about a quart or so left over if you’re using a 5 gallon carboy)
Thursday, March 25, 2010
Cyser
Cyser is a fermented beverage. It is a type of mead. Mead is considered by some to be mankind's oldest fermented beverage. Mead is simply honey and water that has fermented. Early examples were fermented by wild yeast. Mead is independently multicultural. It is known from many sources of ancient history throughout Europe, Africa and Asia, although archaeological evidence of it is ambiguous. Its origins are lost in prehistory; "it can be regarded as the ancestor of all fermented drinks," Maguelonne Toussaint-Samat has observed, "antedating the cultivation of the soil." Claude Lévi-Strauss makes a case for the invention of mead as a marker of the passage "from nature to culture."
Modern manufactured mead is a controlled product just as wine is. Makers control the variables in the manufacture, yielding a consistent product. When honey is mixed with fruit juice the resulting fermentation is a type of mead known as metheglin. When the fruit juice used in making metheglin is apple juice - the resulting fermentation is known as cyser.
One of the best books I've found to help me in my Cider making adventure happens to be a book on Mead. Making Mead seems a natural extension of making Cider. There is a road side honey stand on Venable in Crystal River that I pass every day, so the temptation was too great. 1/2 gallon (5 lbs.) of natural Citrus County Wild Flower Cider followed me home, and a trip to Winn Dixie for the cheapest WD brand Apple Cider (looks just like apple juice) and I was ready to try a new recipe.
This may be my best home brew, and is slightly sweet and very drinkable, in fact it may be the first batch to disapear before the next batch is complete. Too good to hog to myself, We've been readily sharing the cyser.
Recipe
4 gallons Apple juice (bottle says cider)
5 lb. Citrus County natural honey
1 pkg. white wine yeast
Dilute honey so it would flow with about an equal volume of water and heated it to just below the boiling point. This was added to fermenting bucket, and then 3 gallons of the apple juice was dumped in. The yeast package was pitched (dumped into bucket), and the last gallon of juice was poured in to mix the yeast. Bucket was sealed, and allowed to fermentation started in a day or so and was vigorous for about a week, at 8 days it tasted divine, and we added 1/2 tsp of potassium sorbate to stop the fermentation and bottled the next day. The product was not clear but was oh so delicious and drinkable. This will definitely be a formula to repeat.
I'll post a picture of a glass of this "Nectar of the Gods" soon.
Modern manufactured mead is a controlled product just as wine is. Makers control the variables in the manufacture, yielding a consistent product. When honey is mixed with fruit juice the resulting fermentation is a type of mead known as metheglin. When the fruit juice used in making metheglin is apple juice - the resulting fermentation is known as cyser.
One of the best books I've found to help me in my Cider making adventure happens to be a book on Mead. Making Mead seems a natural extension of making Cider. There is a road side honey stand on Venable in Crystal River that I pass every day, so the temptation was too great. 1/2 gallon (5 lbs.) of natural Citrus County Wild Flower Cider followed me home, and a trip to Winn Dixie for the cheapest WD brand Apple Cider (looks just like apple juice) and I was ready to try a new recipe.
This may be my best home brew, and is slightly sweet and very drinkable, in fact it may be the first batch to disapear before the next batch is complete. Too good to hog to myself, We've been readily sharing the cyser.
Recipe
Dilute honey so it would flow with about an equal volume of water and heated it to just below the boiling point. This was added to fermenting bucket, and then 3 gallons of the apple juice was dumped in. The yeast package was pitched (dumped into bucket), and the last gallon of juice was poured in to mix the yeast. Bucket was sealed, and allowed to fermentation started in a day or so and was vigorous for about a week, at 8 days it tasted divine, and we added 1/2 tsp of potassium sorbate to stop the fermentation and bottled the next day. The product was not clear but was oh so delicious and drinkable. This will definitely be a formula to repeat.
I'll post a picture of a glass of this "Nectar of the Gods" soon.
Tuesday, January 26, 2010
How To: Basic Hard Cider the Easy Way
Cider Even an Educator Can Make
First, we’re talking about Hard Cider, taking easily available apple juice or sweet cider and creating a wonderfully inebriating end product is as delicious and discombobulating. The resurgence of commercially available ciders like Hornsby’s, Wood Chuck, and similar, has not gone unnoticed by we teachers of science. At $9 a six pack, enjoying an occasional cider is a treat that at teachers’ salaries cannot be enjoyed very often. History shows that cider was the drink of choice for most Americans prior to our disastrous bout of prohibition. It wasn’t until after prohibition that “cider” meant anything other than “hard cider”.
The preference of the American people to be able to purchase food without preservatives is a boon for those would make their own cider. Most fruit juices are now available without preservatives and make an easy source of fermentable liquid. On the web you can find volumes of information on apple cider sweet and hard talking about fancy ways to blend different apples to get just the right taste. But… we are teachers, worse yet teachers in Florida, access to orchards is limited, and because of our exorbitant pay we are fiscally frugal (the terms my friends use to describe me is “Cheap Bastard”). So the goal is to make a good drinkable cider from inexpensive apple juice available at the grocery store.
Brewing hard cider from nonalcoholic, apple juice or cider is a simple process, and results are very good, if not outstanding. Personally I enjoy homemade hard cider to the commercial stuff. Below is a description to make a fairly stout dry cider, and options for making it sparkling etc.
The Ingredients
Choose Your Juice. Find any preservative free apple juice or cider. To make it easy for you, Motts classic apple juice makes a good hard cider. I’m not so sure the people at the ultra-family friendly Motts want their classic apple juice promoted for home brewing, but it’s quality juice that’s been pasteurized, and is ready for fermenting. Whatever apple juice or cider you choose to buy start by checking the label to be sure the cider doesn’t contain chemical preservatives, because these will kill your yeast and your cider will not ferment. You can brew in smaller batches, but 5 gallons is the standard brewing size, so get yourself 5 gallons of apple juice or cider without preservatives, besides you need enough to share.
Yeast. Any wine or beer yeast will do, cider yeast is great but expensive, for ease of use, and simplicity I’ve had the best results with Red Star Champaign. They are available for less than a dollar on line, or about a dollar at a brewing supply store. The beauty of using Red Star Champaign yeast is that you can get good results with practically zero effort.
Sugar. Yeast turns sugar into alcohol and carbon dioxide. As a teacher I want to go all nuts and explain and diagram and “teach” about yeast, biology and chemistry, but it’s boring and this is a simple method for making a good drinkable cider, so I’ll skip the deep science. What you need to know is more sugar = more alcohol.
I’ve had good luck with brown sugar and table sugar, these are disaccharides. Yeast prefers to dine on monosaccharides but can and will munch out on regular sugar, which again makes this cheap and easy. For this basic recipe were going to use 2 pounds (one package) of light brown sugar.
The Hardware
You’re going to need some minimal supplies; a brewing vessel (carboy), universal carboy cap, an airlock, and some plastic tubing.
Carboy. You can get a 5 gallon carboy (fancy name for a big bottle) from your grocery store or Walmart. .You might even be able to get one from your office. If you buy one sterile and full of water for about $8 or less.
You’re going to have to keep out the roaming yeast, bacteria, and nasties from you fermenting cider. This is done by capping the carboy and putting in an airlock. From any home brewing supply you can get a carboy hood/cap that will hold your air lock and seal your carboy, this will cost from 2 to 5 dollars.
Airlock. Again online and from any home brewing store you can get an air lock, usually for around a dollar.

Tubing. To get your final product from the fermenting vessel to it’s final storage container(s), the easiest way is to siphon it from the brewing vessel using clear tubing (3/8 dia), readily available in the plumbing dept of your local hardware store.
There is lots of other stuff and ways to brew, using 5 gallon buckets with a lid is easier but costs a little more. If you like what you make and it becomes a hobby (like it has for me) then start shopping on line or visit your local brewing supply store. For those of you in the Tampa Bay area, just go to Southern Brewing and tell them you want to make hard cider (or wine, or beer) and they will set you up affordably and teach you more than you want to know. They even have a “fermentologist” working there.

Brewing
Time to Brew, first get all the hardware ready by sanitizing it.
Sanitize . Wash your carboy, cap, and airlock then rinse thoroughly.
Fill a bucket, pot or whatever with water and a cap full of chlorine bleach and soak the carboy cap, and airlock to kill off any coodies for 30 min. Add 2 caps of chlorine bleach to the carboy and fill it water and let it sit for 30 min. If the Carboy is a sealed unopened full water container you can skip this and just open the carboy and dump out the water.
While the hardware is soaking in the bleach make a simple syrup from the brown sugar by dissolving it in about a quart of water. The only way a quart of water will dissolve 2 pounds of sugar is to heat it up, it doesn’t matter if you boil it but I find that a medium heat and stirring often will dissolve the sugar and make nice simple syrup. This is similar to making a simple syrup for making rock candy.
Being careful not to contaminate the cleaned and sanitized hardware rinse it, then rinse it again, the chlorine bleach used to kill bad coodies will also kill the yeast.
Next, pour the simple syrup into your sanitized fermentation vessel and pour all the apple juice in on top of that, keep your apple juice bottles; you will need them for your finished product. Wash and rinse them for bottling day.
Pitch the Yeast. Pitiching the yeast is a fancy brewer’s way of saying start-er-up. This is where choosing Red Star Champaign yeast is a benefit. Open the yeast pack and dump into your fermenting vessel. There are lots of complicated and messy ways of pitching yeast, but I’ve never had to do more than dumping the yeast into the carboy, or brewing bucket.
Ferment. Put on the carboy cap and affix the air lock then fill the air lock with water, if your paranoid use vodka as the alchol will kill any coodies that try to get by. In a day or so it will start bubbling, let it go till it stops bubbling. The gas it’s releasing is carbon dioxide, a byproduct of the fermentation process. Congratulations, your apple juice is on its way to becoming a delicious, inebriating elixir of the gods! Well to be the elixir of the gods use Honey instead of sugar (that technically makes it a mead not a cider but it’s damn good). This bubbling should subside within two weeks, signifying an end to the primary fermentation. After that, let the cider sit another day or two (up to a week) to allow the yeast to settle out.
Options For Bottling
There are a couple of different ways you can go at this point:
Bottle the Cider Now. If you want to bottle the cider immediately, sanitize the bottles the apple juice came in and the clear tubing you purchased from the hardware store using a little chlorine bleach and soaking them for 30 min before thoroughly rinsing them. Use the tubing to siphon the new hard cider into bottles put the lids on them and enjoy.
You can let the bottled hard cider sit for another two weeks and clarify in the plastic jugs. When you first bottled your cider it will probably be a little cloudy, not to worry it’s just floating yeast. Your cider will probably be “still” (i.e., not fizzy) unless you let it age for several months. Hard cider is more like wine than beer, and the flavor will improve as it ages, but feel free to start drinking it now.
Option A: Let it Clarify. If you only use one fermenter, your cider will taste fine, but may not be perfectly clear because it will probably still have some suspended yeast. To reduce cloudiness, siphon your cider into a secondary fermenter (another carboy). Sanitize this carboy like the first before filling it with cider. Once you’ve siphoned your cider into the secondary fermenter, put a sanitized lid and airlock. A week to a month should be ample time for the cider to clarify. After it’s aged for as long as you can stand, bottle it as above. This cider will most definitely be “still,” with no bubbles.
Option B: Make Sparkling Cider. Regardless of whether you decide to bottle immediately or let it clarify in a secondary fermenter, if you want “sparkling” cider, you’ll have to add a couple steps at bottling time and quite a bit more equipment including glass bottles, or growlers, caps and a capper. Save making sparkling cider for when your more enthusiastic or are willing to spend a $50 or so in start costs.
If you insist on sparkling Cider - First, boil 1 cup water with three-fourths cup honey or brown sugar. Pour this mixture into a sanitized bottling bucket (i.e., another fermentation bucket with a spigot at the bottom). Then, siphon your cider over from your fermentation bucket to the bottling bucket. The honey or brown sugar syrup and cider should mix together naturally, but stir slowly with a sanitized spoon if you feel it is necessary. Then, bottle as you would normally. You’ll have to let this sit a bit longer than the still cider, so the residual yeast will have time to ferment the sugar you added and carbonate the cider inside the bottle.
Drink the Cider! At this point, it’s time to start drinking your cider and thinking about brewing your next batch. With time and experience, your skills will grow and your recipes will become more complex. Soon, you’ll be making cider that delights your friends and terrifies your enemies.
First, we’re talking about Hard Cider, taking easily available apple juice or sweet cider and creating a wonderfully inebriating end product is as delicious and discombobulating. The resurgence of commercially available ciders like Hornsby’s, Wood Chuck, and similar, has not gone unnoticed by we teachers of science. At $9 a six pack, enjoying an occasional cider is a treat that at teachers’ salaries cannot be enjoyed very often. History shows that cider was the drink of choice for most Americans prior to our disastrous bout of prohibition. It wasn’t until after prohibition that “cider” meant anything other than “hard cider”.
The preference of the American people to be able to purchase food without preservatives is a boon for those would make their own cider. Most fruit juices are now available without preservatives and make an easy source of fermentable liquid. On the web you can find volumes of information on apple cider sweet and hard talking about fancy ways to blend different apples to get just the right taste. But… we are teachers, worse yet teachers in Florida, access to orchards is limited, and because of our exorbitant pay we are fiscally frugal (the terms my friends use to describe me is “Cheap Bastard”). So the goal is to make a good drinkable cider from inexpensive apple juice available at the grocery store.
Brewing hard cider from nonalcoholic, apple juice or cider is a simple process, and results are very good, if not outstanding. Personally I enjoy homemade hard cider to the commercial stuff. Below is a description to make a fairly stout dry cider, and options for making it sparkling etc.
The Ingredients
Choose Your Juice. Find any preservative free apple juice or cider. To make it easy for you, Motts classic apple juice makes a good hard cider. I’m not so sure the people at the ultra-family friendly Motts want their classic apple juice promoted for home brewing, but it’s quality juice that’s been pasteurized, and is ready for fermenting.
Whatever apple juice or cider you choose to buy start by checking the label to be sure the cider doesn’t contain chemical preservatives, because these will kill your yeast and your cider will not ferment. You can brew in smaller batches, but 5 gallons is the standard brewing size, so get yourself 5 gallons of apple juice or cider without preservatives, besides you need enough to share.Yeast. Any wine or beer yeast will do, cider yeast is great but expensive, for ease of use, and simplicity I’ve had the best results with Red Star Champaign. They are available for less than a dollar on line, or about a dollar at a brewing supply store.
The beauty of using Red Star Champaign yeast is that you can get good results with practically zero effort.Sugar. Yeast turns sugar into alcohol and carbon dioxide. As a teacher I want to go all nuts and explain and diagram and “teach” about yeast, biology and chemistry, but it’s boring and this is a simple method for making a good drinkable cider, so I’ll skip the deep science. What you need to know is more sugar = more alcohol.
I’ve had good luck with brown sugar and table sugar, these are disaccharides. Yeast prefers to dine on monosaccharides but can and will munch out on regular sugar, which again makes this cheap and easy. For this basic recipe were going to use 2 pounds (one package) of light brown sugar.
The Hardware
You’re going to need some minimal supplies; a brewing vessel (carboy), universal carboy cap, an airlock, and some plastic tubing.
Carboy. You can get a 5 gallon carboy (fancy name for a big bottle) from your grocery store or Walmart.
.You might even be able to get one from your office. If you buy one sterile and full of water for about $8 or less.You’re going to have to keep out the roaming yeast, bacteria, and nasties from you fermenting cider. This is done by capping the carboy and putting in an airlock. From any home brewing supply you can get a carboy hood/cap that will hold your air lock and seal your carboy, this will cost from 2 to 5 dollars.
Airlock. Again online and from any home brewing store you can get an air lock, usually for around a dollar.
Tubing. To get your final product from the fermenting vessel to it’s final storage container(s), the easiest way is to siphon it from the brewing vessel using clear tubing (3/8 dia), readily available in the plumbing dept of your local hardware store.
There is lots of other stuff and ways to brew, using 5 gallon buckets with a lid is easier but costs a little more. If you like what you make and it becomes a hobby (like it has for me) then start shopping on line or visit your local brewing supply store. For those of you in the Tampa Bay area, just go to Southern Brewing and tell them you want to make hard cider (or wine, or beer) and they will set you up affordably and teach you more than you want to know. They even have a “fermentologist” working there.
Brewing
Time to Brew, first get all the hardware ready by sanitizing it.
Sanitize . Wash your carboy, cap, and airlock then rinse thoroughly.
Fill a bucket, pot or whatever with water and a cap full of chlorine bleach and soak the carboy cap, and airlock to kill off any coodies for 30 min. Add 2 caps of chlorine bleach to the carboy and fill it water and let it sit for 30 min. If the Carboy is a sealed unopened full water container you can skip this and just open the carboy and dump out the water.
While the hardware is soaking in the bleach make a simple syrup from the brown sugar by dissolving it in about a quart of water. The only way a quart of water will dissolve 2 pounds of sugar is to heat it up, it doesn’t matter if you boil it but I find that a medium heat and stirring often will dissolve the sugar and make nice simple syrup. This is similar to making a simple syrup for making rock candy.
Being careful not to contaminate the cleaned and sanitized hardware rinse it, then rinse it again, the chlorine bleach used to kill bad coodies will also kill the yeast.
Next, pour the simple syrup into your sanitized fermentation vessel and pour all the apple juice in on top of that, keep your apple juice bottles; you will need them for your finished product. Wash and rinse them for bottling day.
Pitch the Yeast. Pitiching the yeast is a fancy brewer’s way of saying start-er-up. This is where choosing Red Star Champaign yeast is a benefit. Open the yeast pack and dump into your fermenting vessel. There are lots of complicated and messy ways of pitching yeast, but I’ve never had to do more than dumping the yeast into the carboy, or brewing bucket.
Ferment. Put on the carboy cap and affix the air lock then fill the air lock with water, if your paranoid use vodka as the alchol will kill any coodies that try to get by. In a day or so it will start bubbling, let it go till it stops bubbling. The gas it’s releasing is carbon dioxide, a byproduct of the fermentation process. Congratulations, your apple juice is on its way to becoming a delicious, inebriating elixir of the gods! Well to be the elixir of the gods use Honey instead of sugar (that technically makes it a mead not a cider but it’s damn good). This bubbling should subside within two weeks, signifying an end to the primary fermentation. After that, let the cider sit another day or two (up to a week) to allow the yeast to settle out.
Options For Bottling
There are a couple of different ways you can go at this point:
Bottle the Cider Now. If you want to bottle the cider immediately, sanitize the bottles the apple juice came in and the clear tubing you purchased from the hardware store using a little chlorine bleach and soaking them for 30 min before thoroughly rinsing them. Use the tubing to siphon the new hard cider into bottles put the lids on them and enjoy.
You can let the bottled hard cider sit for another two weeks and clarify in the plastic jugs. When you first bottled your cider it will probably be a little cloudy, not to worry it’s just floating yeast. Your cider will probably be “still” (i.e., not fizzy) unless you let it age for several months. Hard cider is more like wine than beer, and the flavor will improve as it ages, but feel free to start drinking it now.
Option A: Let it Clarify. If you only use one fermenter, your cider will taste fine, but may not be perfectly clear because it will probably still have some suspended yeast. To reduce cloudiness, siphon your cider into a secondary fermenter (another carboy). Sanitize this carboy like the first before filling it with cider. Once you’ve siphoned your cider into the secondary fermenter, put a sanitized lid and airlock. A week to a month should be ample time for the cider to clarify. After it’s aged for as long as you can stand, bottle it as above. This cider will most definitely be “still,” with no bubbles.
Option B: Make Sparkling Cider. Regardless of whether you decide to bottle immediately or let it clarify in a secondary fermenter, if you want “sparkling” cider, you’ll have to add a couple steps at bottling time and quite a bit more equipment including glass bottles, or growlers, caps and a capper. Save making sparkling cider for when your more enthusiastic or are willing to spend a $50 or so in start costs.
If you insist on sparkling Cider - First, boil 1 cup water with three-fourths cup honey or brown sugar. Pour this mixture into a sanitized bottling bucket (i.e., another fermentation bucket with a spigot at the bottom). Then, siphon your cider over from your fermentation bucket to the bottling bucket. The honey or brown sugar syrup and cider should mix together naturally, but stir slowly with a sanitized spoon if you feel it is necessary. Then, bottle as you would normally. You’ll have to let this sit a bit longer than the still cider, so the residual yeast will have time to ferment the sugar you added and carbonate the cider inside the bottle.
Drink the Cider! At this point, it’s time to start drinking your cider and thinking about brewing your next batch. With time and experience, your skills will grow and your recipes will become more complex. Soon, you’ll be making cider that delights your friends and terrifies your enemies.
Subscribe to:
Posts (Atom)